
Getting into screen printing at home starts with the right gear, and Speedball screen printing kits have become the go-to choice for beginners. These all-in-one sets include frames, inks, squeegees, and photo emulsion, everything you need to pull your first print without hunting down individual supplies.
At Dr. Tee’s Design & Screen Printing, we’ve spent over 20 years mastering this craft for Kansas City businesses and organizations. That hands-on experience gives us a clear view of what works for newcomers and where most beginners run into trouble with their first DIY setup.
This guide walks you through setting up your Speedball kit, preparing your screen, and pulling clean prints. You’ll learn practical tips that prevent common mistakes and help you decide whether home printing fits your needs, or if partnering with a professional shop makes more sense for your project.
What you need before you start
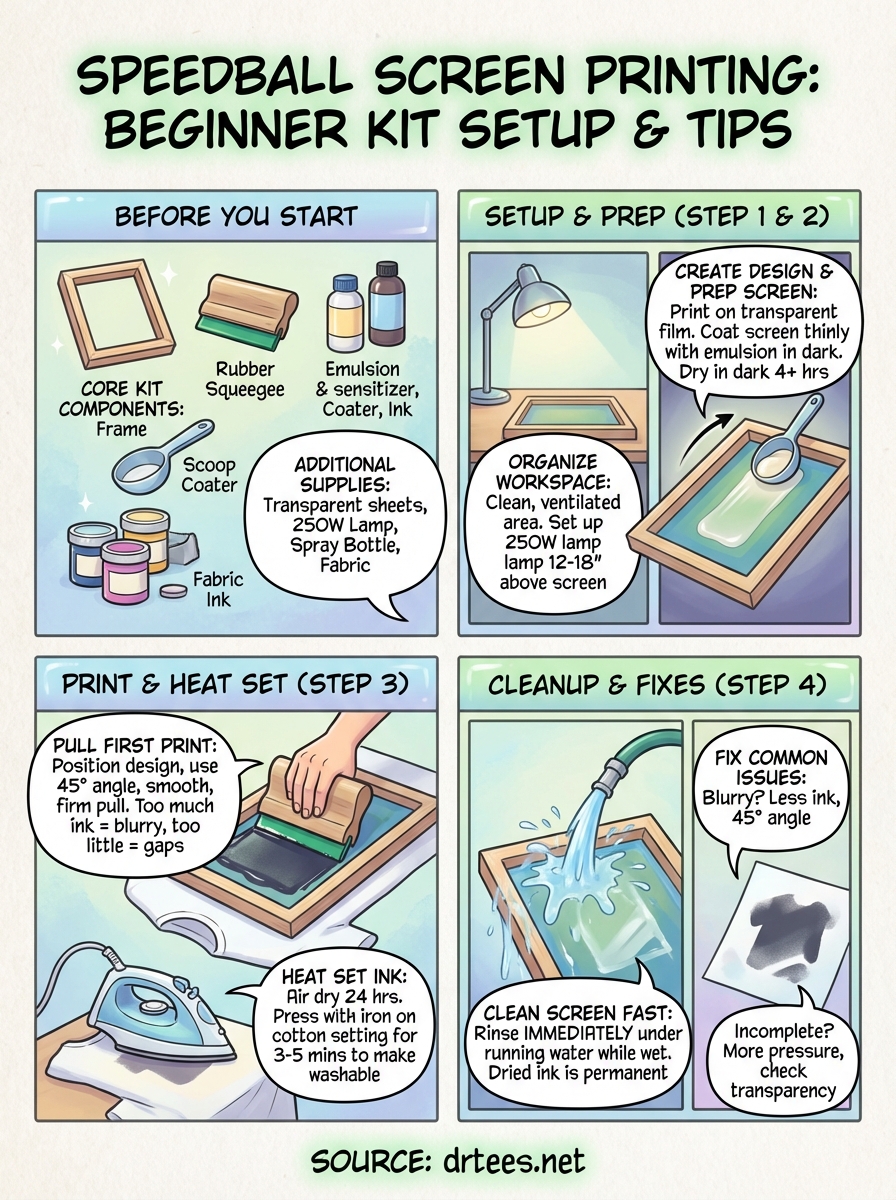
Your Speedball screen printing kit contains most of the essential tools, but you’ll want to verify the contents before diving in. Most beginner kits include a pre-stretched screen, squeegee, photo emulsion, scoop coater, and fabric ink, though the exact items vary by package. Check the box against the product listing to confirm nothing is missing.
Core kit components
A standard Speedball starter kit typically includes the frame and mesh screen (often 10″ x 14″), a rubber squeegee for pulling ink, photo emulsion and sensitizer for creating your stencil, a scoop coater for applying emulsion evenly, and water-based fabric inks in basic colors. You’ll also find instruction sheets that outline the process, though they can be vague on timing and technique details that matter most.
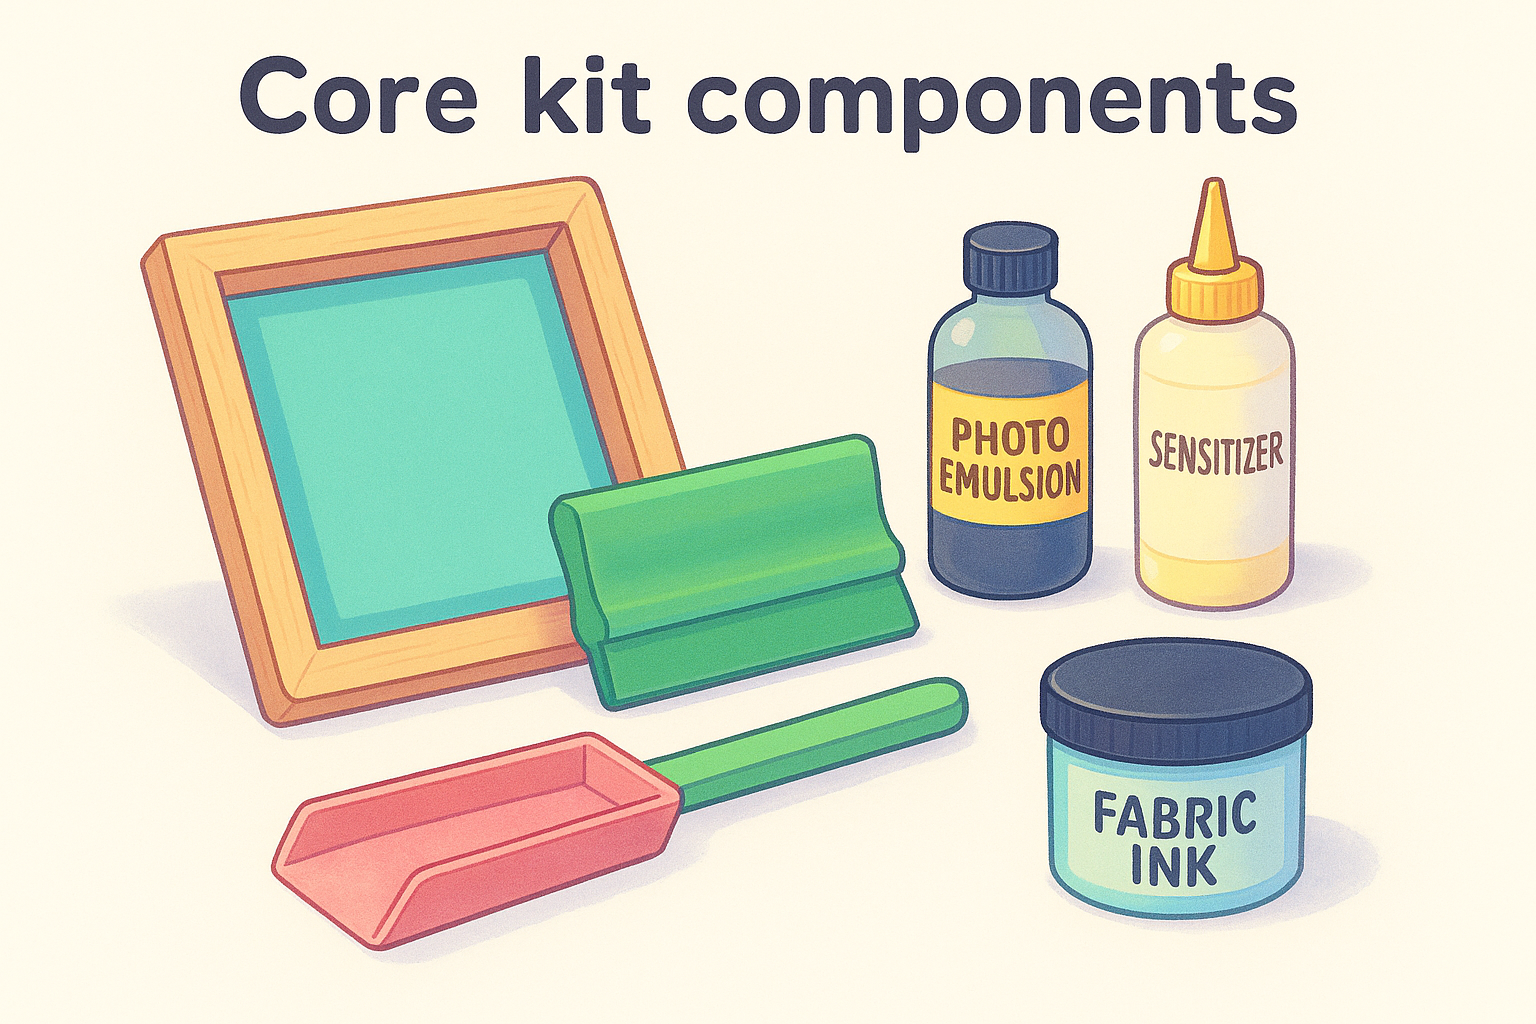
The kit gives you enough supplies for several test prints once you understand the workflow. Most packages include a single screen, so you’ll need to clean and reclaim it between different designs.
Additional supplies you’ll need
Beyond what’s in the box, gather these items before starting: clear acetate or vellum sheets for printing your design (standard printer paper works but lets through too much light), a bright lamp or grow light rated at 250 watts minimum for exposing the screen, black fabric or foam board to block light from the back during exposure, and a spray bottle or hose attachment for washing out your design.
The exposure light makes or breaks your stencil quality, so don’t skip investing in a proper bulb.
You’ll also need scrap fabric for test prints, painter’s tape to secure your screen, and newspaper or cardboard to place inside shirts during printing. Keep paper towels and a bucket of water nearby for quick cleanup before the emulsion dries.
Step 1. Set up your Speedball kit and workspace
Before you mix emulsion or prepare your screen, you need to organize your workspace and verify your kit contents. A proper setup prevents rushed mistakes and keeps your materials from getting damaged during the multi-step process. Taking 15 minutes to prepare saves hours of frustration later.
Unpack and organize your materials
Open your Speedball screen printing kit and lay out each component on a clean, flat surface. Check the frame for any damage to the mesh or wooden edges, inspect the squeegee blade for nicks or warping, and confirm your emulsion and sensitizer are sealed and unexpired (check the date on the bottles). Store the photo emulsion in a dark cabinet or drawer, as exposure to room light will ruin it before you start.
Keep your ink bottles sealed until you’re ready to print. Group similar items together: emulsion supplies in one spot, printing tools in another, and keep your instruction sheets visible for quick reference during each step.
Prepare your printing area
Choose a workspace with access to water and good ventilation for washing screens and cleaning up. Cover your work surface with plastic sheeting or newspaper to protect it from ink and emulsion spills. Set up your exposure station separately with your bright lamp positioned 12 to 18 inches above where the screen will sit, allowing even light coverage across the entire mesh area.
Position your lamp too close and you’ll burn through your stencil; too far away extends exposure time and risks underdevelopment.
Create a dedicated drying rack using a cardboard box or books to prop your screen at an angle after coating with emulsion.
Step 2. Create your design and prep the screen
Creating a clean stencil for Speedball screen printing requires a high-contrast design and proper emulsion technique. Your design needs to block light completely during exposure, while the emulsion must coat evenly across the mesh. Rushing either step leads to incomplete stencils that won’t hold up during printing.
Print your design on transparent film
Design your artwork in black and white using any graphics program or even a word processor. Keep shapes simple for your first print, avoiding tiny details or thin lines under 1/8 inch. Print the design onto clear acetate sheets using a standard inkjet or laser printer, making sure the black areas are solid and opaque. Hold the printed sheet up to a light to verify no gaps exist in your design.
If your printer produces faint blacks, print two copies and layer them together with transparent tape to increase opacity.
Coat the screen with emulsion
Mix your photo emulsion and sensitizer following the bottle instructions, typically a 10-to-1 ratio. Stir gently to avoid bubbles, then let the mixture sit for 30 minutes. Pour a thin line of emulsion into your scoop coater, tilt the screen at a 45-degree angle, and drag the coater upward in one smooth motion on both sides of the mesh. Apply a thin, even layer without going over the same area multiple times.

Coating too thick creates longer exposure times and makes washing out your design nearly impossible.
Dry the coated screen in a dark space for at least 4 hours, propping it at an angle so air circulates on both sides.
Step 3. Print on fabric and heat set the ink
Once your screen is exposed and washed out, you’re ready to transfer ink onto fabric. This step requires a steady hand and proper pressure to push ink through the mesh evenly. Your first few prints will help you learn the right squeegee angle and speed for consistent results.
Position your design and pull the first print
Place your test fabric on a flat surface with cardboard or foam board inside to prevent ink bleeding through. Position your screen over the fabric and secure it with painter’s tape on two sides to prevent shifting. Spoon a line of Speedball screen printing ink along the top edge of your design area, using about 2 tablespoons for a standard print size.
Hold the squeegee at a 45-degree angle and pull it toward you in one smooth, firm motion. Lift the screen immediately to check your print. Apply enough pressure that the screen touches the fabric during the pull but bounces back after.
Too much ink creates blurry edges, while too little leaves gaps in your design.
Heat set the ink for permanence
Wait 24 hours for the ink to air dry completely before heat setting. Place a thin cloth over your printed design and press with an iron set to the cotton setting for 3 to 5 minutes, moving slowly across the entire design area. The heat bonds the ink permanently to the fabric fibers, making your print washable.
Step 4. Clean up fast and fix common issues
Cleaning your screen within 10 minutes of finishing your print session prevents permanent ink buildup and extends the life of your mesh. Quick cleanup also lets you reuse the same screen for new designs after you strip the emulsion. Addressing common problems during your first few prints helps you troubleshoot faster next time.
Clean your screen immediately
Rinse your screen under running water while the ink is still wet, using a soft brush or cloth to gently scrub both sides of the mesh. Water-based Speedball screen printing inks wash out easily when fresh but become nearly impossible to remove once dry. Spray both sides thoroughly until the water runs clear and hold the screen up to light to verify all ink is gone from the mesh openings.
Dried ink in your mesh creates permanent holes in your stencil that ruin future prints.
Fix these common printing problems
Blurry edges happen when you flood the screen with too much ink or hold the squeegee at the wrong angle. Use less ink and maintain a consistent 45-degree pull. Incomplete prints result from insufficient pressure during your squeegee stroke or gaps in your design transparency. Press harder and verify your artwork blocks light completely. Ink bleeding under the stencil means your screen is sitting too close to the fabric, so add a thin spacer under the frame edges to create proper off-contact distance.
Next steps
You now have the core workflow for Speedball screen printing from coating screens to pulling prints. Practice with simple designs on scrap fabric to build your technique before moving to finished garments. Each print session teaches you more about ink consistency, squeegee pressure, and exposure timing that affects your final results.
Home printing works well for personal projects and small batches when you have time to troubleshoot and refine your process. Larger orders or tight deadlines often benefit from professional equipment and two decades of hands-on experience. If you’re facing bulk orders for your business or need consistent quality across hundreds of employee shirts, partnering with an established shop eliminates the trial-and-error phase that eats up your valuable time.
Contact Dr. Tee’s Design & Screen Printing for a quote on your next project, whether you need help with design work or want to hand off the entire printing process while you focus on running your business.
